This article explains, step by step, how to create and edit Learning Resources in TRAK.
Please note: Creating and editing Learning Resources are exclusive to Learning Administrators. If you wish to obtain this permission, kindly communicate with your User Administrator.
What's covered
Creating a new Learning Resource
Creating a new Learning Resource
Select "Create new learning resource" in the "Search Learning" page to begin creating a new Learning Resource.

A Learning Resource can be created in 6 easy steps by filling in the fields prompted on the screen and selecting "Next" once completed.
The first step is crucial in the set up of the Learning Resource.
- Please choose a title - (Maximum 100 characters). This title will be displayed on the search results. This can be updated at any point in time.
- Feature image - Recommended dimensions are 500px x 500px and no more than 500kB. File type should be JPG, JPEG or PNG. This feature image will appear in the dashboard cards in the Next Up section and in Search Learning page in the card view.
- Choose a code - this should be a unique ID.
- Choose a type - choose between the two options eLearning or Instructor led. This cannot be updated once selected.

Once the type of Learning Resource is chosen (eLearning or Instructor led), it cannot be changed later.
- Add a short description - (Maximum 200 characters). This short description will only appear in the search results as part of the card details.
- Describe your learning resource - This is where you can place all your content related to the training material as well as embed videos. Feel free to use the "Recommended subheadings" to keep your Learning Resource page structures consistent.
- Duration (optional) - units can be in minutes, hours or days. This will appear in the search results.
- Price (optional)
- Author (optional)


Click "Next"
- Select prerequisites (optional) - Select "+Add condition" to begin. Search for the name of the Learning Resource and choose whether the Learner needs to have "Successfully completed" or "Enrolled" first. There is no limit to the number of conditions you can add as a prerequisite. Choose whether "All" or "Any" of the prerequisites match the criteria.

- Restrict access to groups (optional) - There is no limit to the groups you can select. Start by typing in the name of the group and selecting it from the drop down list

Click "Next"
- Searchable - The two options are "Public" (default) and "Unlisted". Unlisted Learning Resources will not appear as a result on the "Search Learning" page. Only those with the link can view the Learning Resource.
- Select a stream (optional) - This can be used as a method for grouping Learning Resources. To create a new Stream label, type in the new steam name and click "Create tag name" to create the new Stream label.

- Select tags (optional) - Tagging the Learning Plan will increase searchability.
Click "Next"
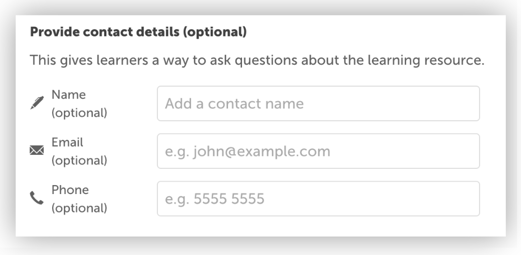
Provide contact details (optional) - Adding contact details can be a great way to let Learners know who they can contact for any queries. Step 6
Step 6 differentiates depending on whether "eLearning" or "Instructor led" was selected back in Step 1.
- eLearning: Upload an eLearning module
This is what will be loaded and the Learner will run through as part of their eLearning. Drag a file into the greyed out section or click to select a file and click "Upload".
- Instructor led: Adding sessions
If you are not ready to add sessions, click the "Review" button alternatively, navigate to How to create and edit Sessions for step by step instructions.
Once you've added all the sessions or eLearning module, you can select "Done" and then "Review" to review your Learning Resource.
You can "Preview" the page before selecting "Publish" to push the Learning Resource live.

A Learning Resource can only be deleted when it is in draft. Once published, a Learning Resource may be archived.
Editing a Learning Resource
To edit a Learning Resource, navigate to the Learning Resource you wish to edit and click "🖋️Edit"
You can edit/update all fields. The only field you cannot toggle between is whether the Learning Resource is an eLearning or an Instructor led training course.
