Please note: The creation and editing of Learning Plans are exclusive to Learning Administrators. If you wish to obtain this permission, kindly communicate with your User Administrator.
What's covered
Arranging the Sections in the Learning Plan
Creating a new Learning Plan
Learn about best practices on how to design a Learning Plan here.


All the editable fields for the Learning Plan will then appear. These fields are:
- Title - (Maximum 100 characters). This title will be displayed on the search results. This can be updated at any point in time.
- Featured Image - This will appear in the grid view on the search results and on the live Learning Page. Recommended dimensions are 500px x 500px and no more than 500kB. File type should be JPG, JPEG or PNG. This feature image will appear in the dashboard cards in the Next Up section and in Search Learning page in the card view.
- Code - this should be a unique ID.
- Short Description - (Maximum 200 characters). This short description will only appear in the search results.
- Description - This is where you can place all your content related to the Learning Plan as well as embed videos and attach downloadable content.
- Stream (optional) - This can be used as a method for grouping Learning Plans. To create a new Stream label, type in the new steam name and click "Create tag name" to create the new Stream label.
- Audience (optional) - Optionally select one or more job positions to show this Learning Plan on Learner's dashboards. Users will see all Learning Plans that are associated with their job positions. The Learning Plan will still be searchable even if there are no audiences selected. The audience also impacts what users will appear in the Gap Report.
- Contact (optional) - This will appear on the Learning Plan as contact details that the Learner can contact in case of a question.
- Learning - This is where you can add your Sections to house the Learning Resources. Learn how to Add New Sections (mandatory for new Learning Plans) or Edit Existing Sections. There is a maximum of 15 sections per Learning Plan.
- Search & Discovery (optional)
- Tags, similar to streams is another method of grouping Learning Plans. The only difference is that there can only be one Stream per Learning Plan whereas a Learning Plan can house multiple tags.
- Control Visibility by selecting between "Public" and "Unlisted". If a Learning Plan is marked as "Unlisted" the Learning Plan will not appear in the Search Learning results. The only way to navigate to the Learning Plan is if the Learner has the link or the Learner's job position is in the audience.
- Author (optional) - Add additional information on the author of the Learning Plan or utilise the Internal author option to select within the organisation.
Once you have completed added all your details, you can "Save draft" to complete later or to push the Learning Plan live, "Save draft" first and then select the "Publish" button.
Editing the Learning Plan
To edit the Learning Plan, navigate to the Learning Plan that you wish to update via the Search Learning page and select the "🖊️ Edit" button.
Within the Learning plan edit page, you have the ability to generate new sections or incorporate existing sections from another Learning Plan. There is maximum of 15 sections per Learning Plan, 20 Learning Resources per section. Remember to click "Save draft" then "Publish" to publish your change.
New Section
To create a new Section, select the "New section" radio button. Type in the title to the new section and click on the "Edit or add learning resources" button.

The Learning plan section editor will pop up where you can search for the learning resources by:
- Searching by keyword
- Status - Live or draft
- Visibility - Public or unlisted
- Tags
You can also sort the search results alphabetically or by latest updated.
Drag and drop the Available Learning Resources in the section on the right. This is where the order of the Learning Resources can be updated.

There is a maximum of 20 Learning Resources per section
Once you have select all the Learning Resources, "Confirm" your choice.
You will then see a preview of the section. Click the "Add section" button once you are happy with section. The new section has now been added. Remember to click "Save draft" then "Publish" to publish your change.

Existing Section
If you select to add an existing Section, click on the second option. Choose from the list of existing sections. You can start typing a section title to filter your options.

Then click on "Add Section"
Remember to click "Save draft" then "Publish" to publish your change.
❗When making changes to an existing section, this update will automatically be reflected in the same section across other Learning Plans.
Removing Sections
Sections can be removed by selecting "Remove section" at the bottom of the Section card you wish to remove. Remember to click "Save draft" then "Publish" to publish your change.

Arranging Sections in a Learning Plan
To rearrange the order of the Learning Resources within a Section, use the arrows at the bottom of the Section cards to edit the sequence. Remember to click "Save draft" then "Publish" to publish your change.

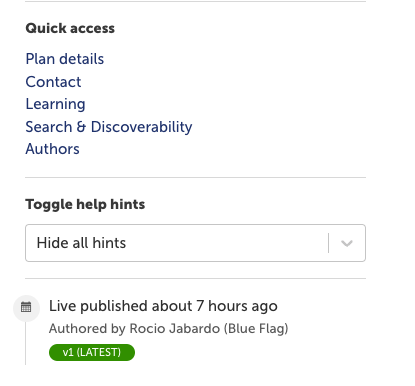
Quick access menu
On the right side on the Learning Plan editing page, you can find a menu with quick access links to the different segments of the Learning Plan, as well as the history of the Learning Plan.